PROJECTS
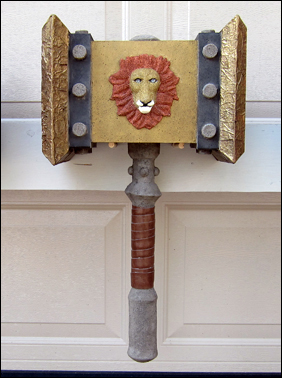
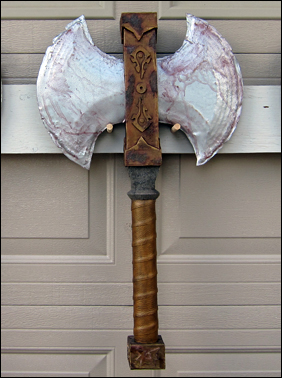
Hammers, Axes and Maces
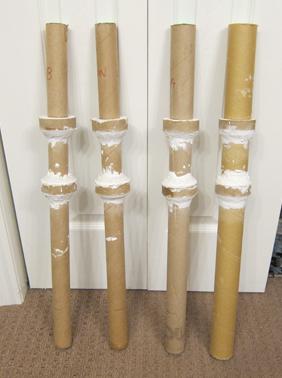
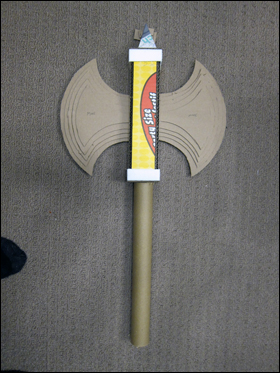
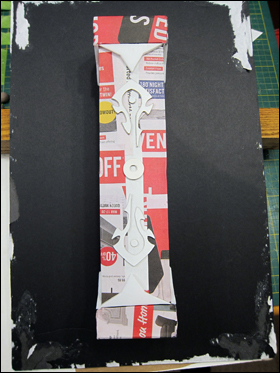
With the advent of computer generated graphics and now images produced through artificial intelligence, the tangible qualities of art are being replaced by the gloss and sheen of pixels on a screen. My preference for physical objects to be handled and viewed from every angle led me to build prop hammers and axes inspired by medieval weapons.
Although there are easier methods to produce the same results, I wanted to make use of the supplies I had on hand rather than purchasing new materials. Fabricated primarily from cardboard sheets, tubes, paper and acrylic paint, these images show some of the steps in the construction process.


DRAGON EGGS
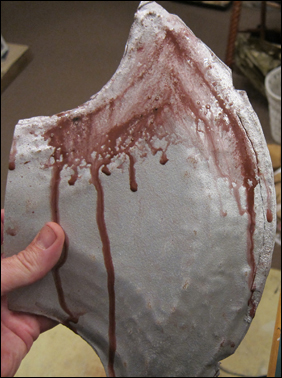
I had purchased some silicone rubber that had a limited shelf life. My original plans didn't work out and I needed to use it up. I had previously done molding and casting of hands with alginate and plaster and this was a natural extension of that programs.
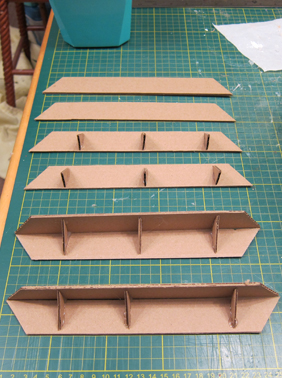
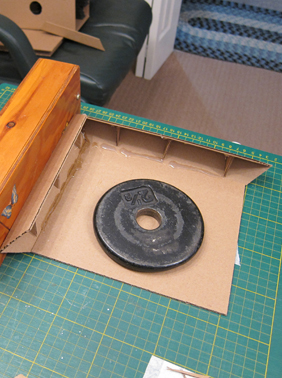
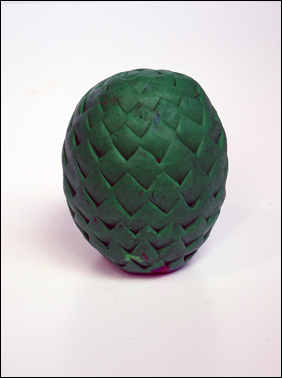
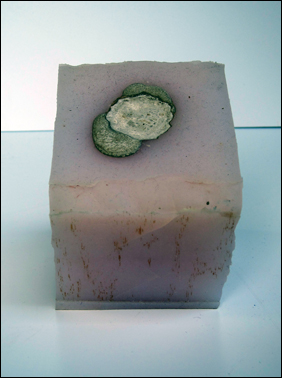
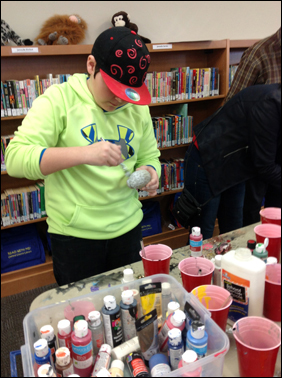
Eight dollar store plastic eggs were covered in plasticine and a scale pattern was carved into the surface. The eggs were then placed in two rows in a box and the silicone mixed and poured in and allowed to cure. The eggs were evenly distributed so that they could be individually cut out to be handled by eight participants at a time.
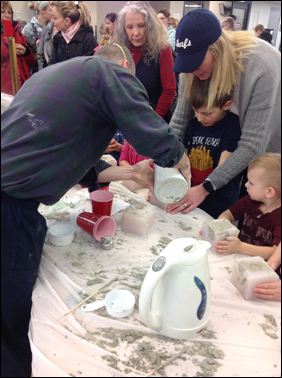
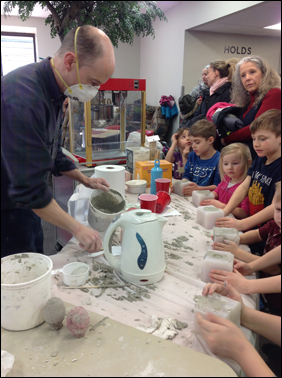
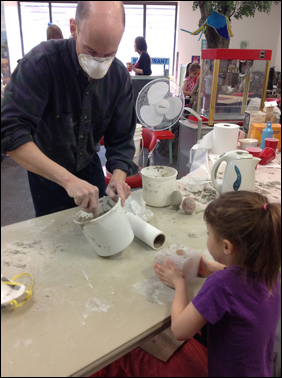
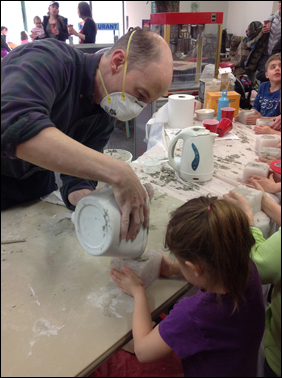
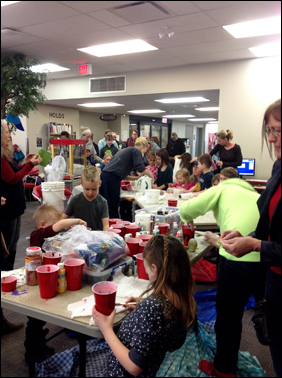
My original plan was to have the children mix the plaster and pour it into their mold as I believe they benefit from being involved in every step of the process. But it quickly became evident that this was going to be too difficult and time-consuming. So I soon started mixing up enough plaster for eight eggs and pouring it into the molds while the children held them closed to prevent the seam from opening.
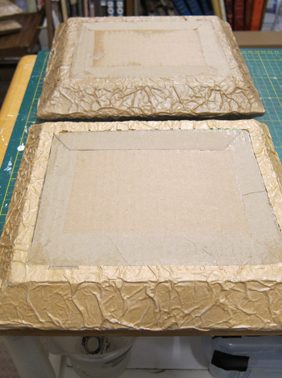
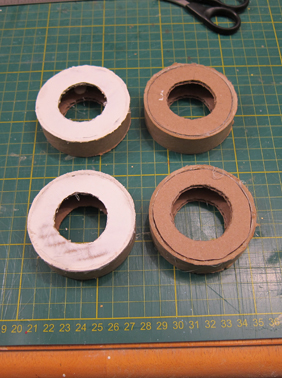
The casting material was a mix of Plaster of Paris and gypsum cement. Using warm water, the material took only a few minutes to harden. This was fortunate as there was alway another eight children waiting to make their dragon eggs. A seam had been cut in the side of each mold allowing it to be pulled open. Since silicone doesn't stick to most other material, this allowed the egg to be easily removed. The children then decorated their eggs using paint and glitter depending on their preference.
ANIMATED COLLECTIBLE CARDS
Background
A PA Day event was organized for the spring of 2015 that explained tricks and stunts that participants could perform to fool their friends. During this program, several pages of optical illusions were distributed. These images had been found online and are available on a YouTube page that describes the principle that makes the effect possible.
During a subsequent meeting with other branch librarians, a discussion ensued about ways to entice children to return throughout the summer because the libraries no longer offer prizes as an incentive.
Following this meeting, I realized that the optical illusions could be reformatted for mass distribution as collectible playing cards. This was ideally suited to the summer reading club theme of PLAY. A different card would be available each week to provide motivation to keep visiting the library.
Retention
Every summer, public libraries across the country provide reading programs to keep children stimulated and engaged.
Despite these efforts, some participants who enroll will stop returning as the weeks progress. This gradual decline in attendance affects small and large libraries alike. If children don't go to the library, they don't have access to the books they need to keep reading.
Today's youth are exposed to an unprecedented amount of media that can occupy their time and attention. Librarians must now compete with options that can stream directly into the home and must develop innovative initiatives to remind children of this vital community centre. Librarians cannot assume that parents will bring or continue to bring their child to the library. But children who are regular library users are more likely to continue as adults.
Optical Principle
Unlike static sport cards, the collectible cards offered by the Tillsonburg Public Library contain an optical illusion. When a grid is placed on top of the card and moved back and forth the image appears to animate.
A design was created then duplicated several times but changed slightly each time. Portions of each image are erased corresponding to the grid. When the grid is placed on top, it reveals only one section. Moved again, it reveals the next. In this way, only one section is seen at a time. Moved left and right, the grid causes the image to appear to animate.
Preparation
Eight images were chosen from the original set that would have broad appeal. They were combined into a Photoshop document and scaled to match the dimensions of a typical playing card. For the illusion to work, the grid must match the cards exactly and the original grid design was similarly resized.
To provide promotional content on the reverse side, the logos for the TD Summer Reading Club and Oxford County Library were added. By matching the position on both sides of the page, when the cards were cut they would be centred and proportional.
There was little cost involved. Transparencies and card stock were used from the library's existing supplies. The responsibility for printing and cutting was shared between the Tillsonburg branch and Head Office.
Implementation
When a child first registered for the summer reading program, they were given a bag of TD Summer Reading Club supplies. These included the notebook, fortune teller and web access code.
At this time, they were also given a grid and their first card. The effect was demonstrated and they were told that each week they returned to report a new card would be available. They were also provided with a small envelope to hold their cards.
An effort was made to select cards that were appropriate for each week. For example, one card features an image of Superman flying through the clouds and this was made available during superhero week.
Animated Card Examples
RED REVEAL
Following the success of my animated collectible card project, I wanted to create a similar incentive for the next summer's reading club.
I enjoy the mystery and surprise of secret decoder messages. An image is hidden and only becomes visible when special glasses are worn. This has particular appeal for children. So often they are told what to know and think. It gives them the sense of having special knowledge that is denied to anyone that doesn't have the glasses. They may even have to tell and adult what it says and this confers a sense of authority.
The technique is often called red reveal because it takes advantage of the way our eyes perceive the color red. It does not require exclusively the color red but can employ other hues in that spectrum such as orange and pink.
Fortunately, I began my research early. It required five months of experimentation to find a combination of colors that worked with the library's printer. I abandoned the idea a couple of times and kept coming back to it. I wanted to be able to do all the printing within the library to save money. I created eight patterns that could be printed over text to hide a message.
The specific implementation of the technique involved a riddle handout and poster. Eight riddles were selected. The question was placed on the left side of the paper and the solution on the right. This involved a two-step process. The question and answer were printed first in a light blue color, then the paper reinserted and the concealing red pattern was printed on top. When the children first registered, they were given a rectangle of red gel that had been cut to fit over the question or answer, not both. Then they received a different riddle each week they returned to report during the summer.
A weekly challenge poster was also created and posted in the branch. A larger piece of red gel was available for children to hold up to their face to read the message.
Red Reveal Examples
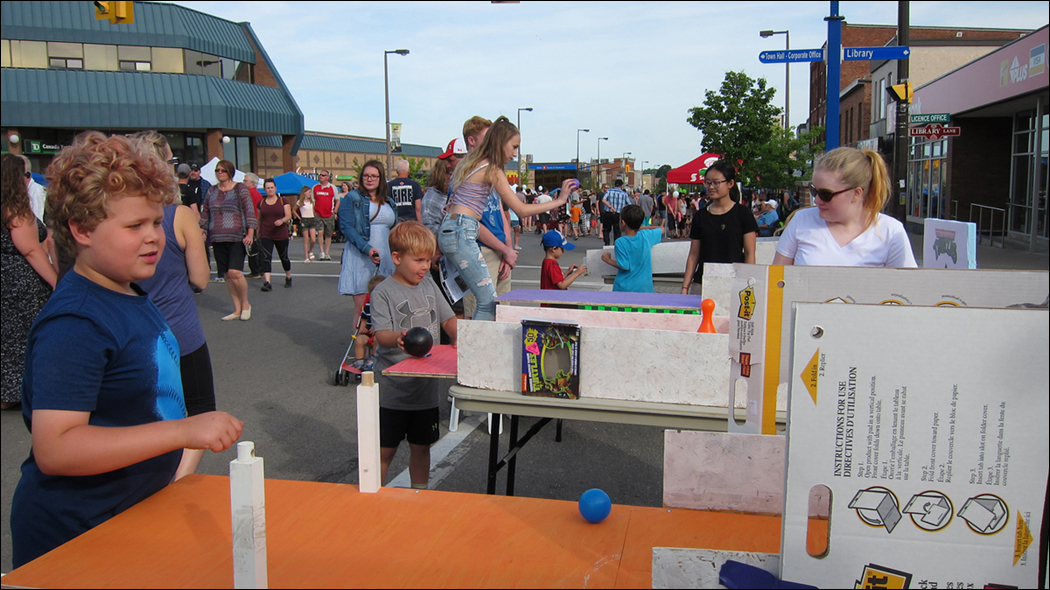
MIDWAY GAMES
I like to make use of recycled materials as often as possible when building my exhibits and displays. The Habitat for Humanity ReStores in my area have been a fantastic source of inexpensive supplies. However, in this case, I wanted the games to be long and my car is only large enough to fit certain lengths of wood. It was a great coincidence that I was looking out of the window one day and saw someone disposing of large sheets of wood behind a dumpster. They were the perfect length and also free.
The wood was cut into four pieces then covered in floor tiles to provide a smooth surface and painted. I rarely discard leftover supplies as they can usually be put to use in another project. Surplus wood was used to create the sides of the games to prevent the balls from rolling off the side. My father used to work in construction and has many screws and these were used to secure everything. Leftover home insulation from earlier displays was used to prop up the signs at the back of the game.
Most of the activities I have designed for Turtlefest have incorporated the Teenage Mutant Ninja Turtles because these are popular with children and will attract attention. Only one of the games has any relationship to the characters, but the four backdrops have different photos of the characters that were found online.
From left to right:
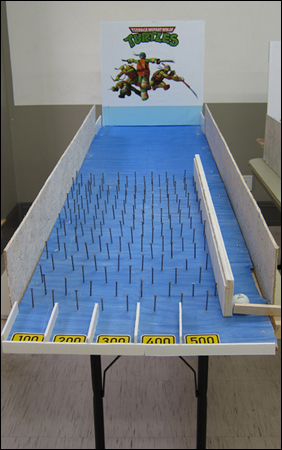
Plinko
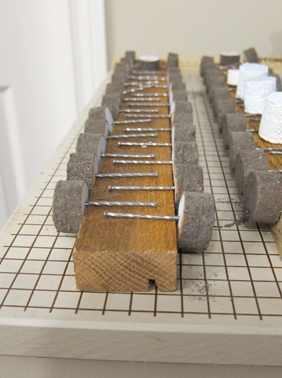
Inspired by the Price is Right game, a box of surplus nails was used to create a grid by hammering them in but leaving most of them exposed. An alley was created at the right side and a paddle built from wood. Children would smack the paddle sending a ping pong ball up the alley where it would bounce off the back and fall down. It would get knocked around inside the nail maze until it fell down into one of the numbered areas at the bottom. This proved to be more of a proof of concept than a successful game. Despite having measured the width of the ping pong ball it still got stuck between some of the nails. And the wood was tilted so that the ball usually ended up in the 100 or 200 slots despite my attempts to prop up the board to correct this. Regardless, children had fun with it and it's something that I look forward to experimenting with more in the future.
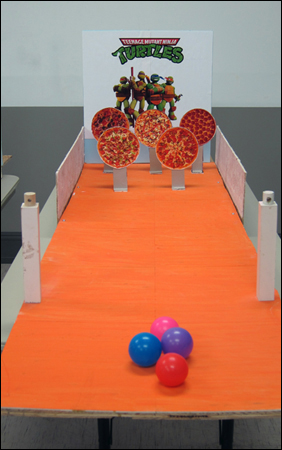
Pizza Plop
The only game to incorporate the characters, pictures of pizzas were printed and cut out because pizza is a ninja turtle's favorite food. The images were glued to cardboard and a base was built to hold them up. The goal was to knock down the pizzas. Two white posts are visible at the bottom of the image. Originally I had conceived of a ball launcher using athletic tubing connected to a cup that children would pull back and use to aim at the pizzas. This proved to be unreliable and at the last minute I removed that component and went with just a ball throw which proved challenging enough for younger children.
The pizzas remained upright in the program room but outside the wind was too much for the simple stands. Bolts were taped to the front of the base to add extra weight and additional cardboard was added to the side to create a wind barrier. The only change that was made was to use just 3 pizzas instead of the five pictured, again because 3 proved challenging enough for younger kids.Ball Toss
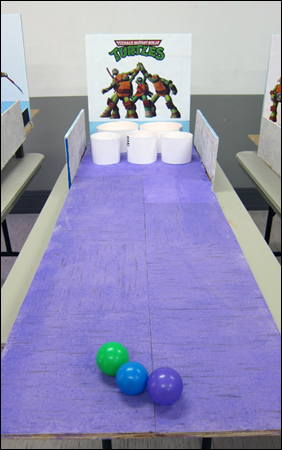
This was inspired by the carnival game where balls are rolled up a ramp and bounce into holes. I knew throwing a ball would be difficult enough, so cups were made from plastic buckets that were cut to size. There were 2 large and 3 small cups. This game involved a lot of ball chasing when kids overthrew the barriers and I was fortunate to have a very patient page helping with this.
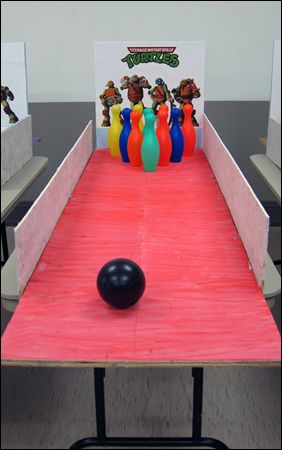
Bowling
Knowing that the games were going to be played on long lengths of wood, it seemed natural that one would involve bowling. I already owned a colorful children's bowling set that I had purchased at an auction and this was the easiest game to design. But it did involve picking up a lot of pins and, again, the page was very patient with this repetitive task.
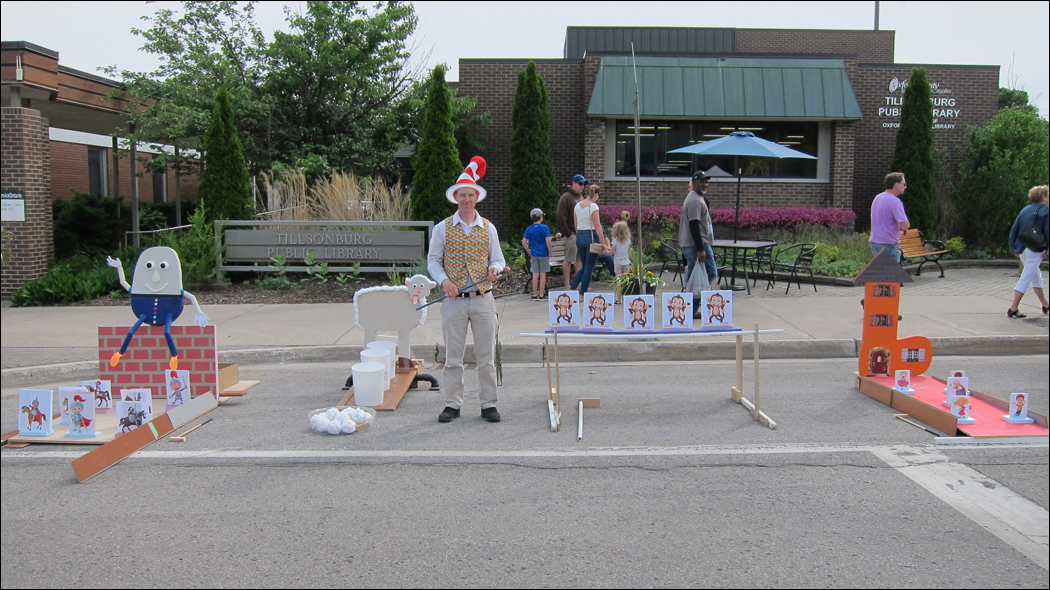
2019 Update
Based on the popularity of my first attempt, I created four new games the following year. Rather than having them on tables, these were all created to be on the ground for easier access by younger children. They were all based on nursery rhymes. There were two miniature golf games inspired by Humpty Dumpty and the Old Woman Who Lived in a Shoe. A ball toss game was inspired by Little Bo Peep with cotton balls glued onto plastic balls to be tossed into baskets. Finally, the 5 Little Monkeys rhyme was used as the basis for a game where children would use a stick to make the monkeys jump off the bed.
Midway Games Photographs